My journey with the Wacaco Minipresso GR2 isn’t my first rodeo with this brand. Having previously purchased the Picopresso and recently welcomed the Wacaco Pipamoka into my life, I’ve been consistently impressed by the excellent quality of these machines. So, I reached out to Wacaco and proposed testing the Minipresso GR2 for my site, to which they kindly agreed by providing me with a unit. Please note, this generosity will not sway my review for CoffeeGeek in any way.Wacaco has given me complete freedom in crafting this article.
Unveiling the Aesthetics and Design of the Wacaco Minipresso GR2
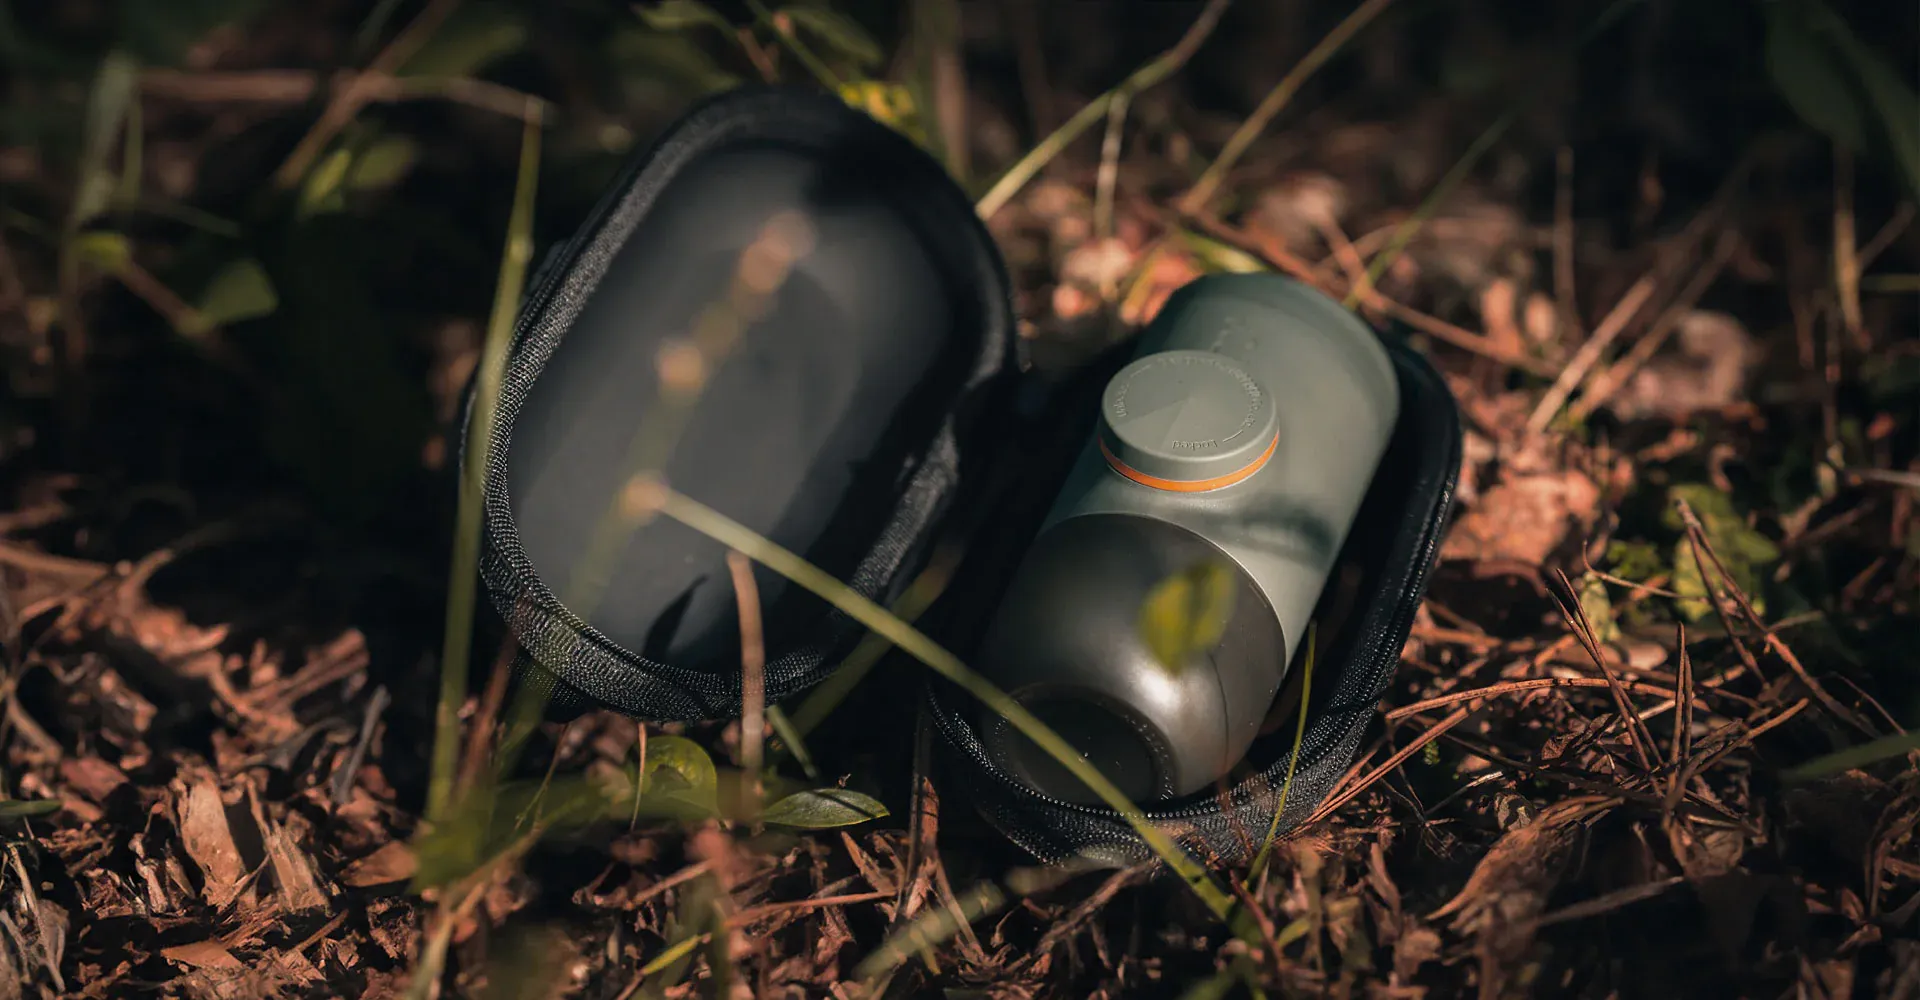
Introducing the Minipresso GR2, a portable espresso machine meticulously crafted for those who can’t resist a good cup of coffee, no matter where they are. Its compact and lightweight design makes it a breeze to carry around. The best part? It operates manually, without the need for electricity or gas cartridges. Whether you prefer a strong shot or a milder one, it can hold 8 or 12 grams of ground coffee and brews approximately 45 ml of rich, aromatic espresso. With its ergonomic design, the Minipresso GR2 is the perfect companion for travel, camping trips, or even those much-needed office coffee breaks.
Here’s what comes with your GR2:
Minipresso GR2 (portable espresso machine)
Integrated 60 mlwater tank
Filter holder for 8 or 12 grams of ground coffee
Coffeemeasuring spoon
Tamper to pack ground coffee
Support for filter holder
Carrying case
User manual to guide preparation
From my personal experience, I appreciate the tactile sensation it provides. Despite being crafted from plastic, it exudes a sense of premium quality that contributes to its robust feel. The design is impeccable, with accessories fitting seamlessly into the water tank. As you use it, you’ll discover a myriad of carefully considered details, demonstrating Wacaco’s relentless pursuit of excellence.
Wacaco has truly pushed the boundaries of miniaturization with this latest generation of Minipresso. This leap forward is beautifully captured in the photo below, which illustrates the progression from the GR to the GR2 models.
Brewing the Perfect Cup with the Wacaco Minipresso GR2
Once I’ve gently lifted the GR2 from its snug case, I carefully extract the accessories tucked away in the water tank. Next, I detach the cap that doubles as a cup, and finally, I position the Minipresso securely on its base.
First, I take off the cup, followed by unscrewing the base of the GR2. This base doubles as a filter holder. You have two options to choose from: 8g or 12g. Personally, I’m partial to the 12g setting. Wacaco has ingeniously crafted a base that enables the filter-holder to stand upright, ensuring its stability and preventing it from touching the table directly.
Looking to adjust your filter to 8g or 12g? I’ve discovered a handy animation on the official GR2 page that makes the process a breeze. All you need to do is add or remove a plastic disc. Plus, the animation also demonstrates the simplicity of disassembling and cleaning the filter. It’s as easy as pie!
When it comes to brewing my coffee, I start by meticulously measuring out 12g of beans. These are then finely ground using my trusty travel companion, the Timemore ESP C3 coffee grinder. While I’m busy with the beans, I set the kettle to work, heating up the water to the perfect temperature.
Included in the accessories is a funnel designed to assist you in pouring ground coffee into the filter. Despite its modest size, it accomplishes its task with absolute precision.
Before I start tamping, I personally like to distribute the coffee using a tool known as a WDT. This is a crucial step in the professional espresso-making world, as it helps prevent a common issue known as channeling. While there are various methods to mitigate this issue, it’s worth noting that channeling doesn’t significantly affect the Minipresso. However, if you’re curious to learn more about this topic, feel free to check out this informative article.
Passage of the WDT to distribute the coffee.
Next, I lightly tap the filter on the work surface to compact the coffee slightly before removing the funnel.
Filter with ground coffee before tamping.
When it comes to tamping, the spoon can conveniently double up as a tamper. There’s absolutely no need to exert too much force. In my own experience, I’ve found that applying a pressure of about 3 to 5 kg does the trick just fine.
Before you begin the extraction process, it’s a good idea to warm up the different parts of your Minipresso GR2 using hot water. Here’s a simple way to do it: Pour some hot water into the reservoir. Then, without putting in the filter, give the pump a few presses. This will allow some water to flow through the coffee machine’s system, effectively preheating it.
With everything now set up perfectly, I’m all set to commence the extraction process.
First, I attach the filter holder to the GR2. Next, I fill the reservoir with hot water. After securely closing it, I proceed to pump.
Upon receiving the Minipresso, I found myself pondering a question – should I fully tighten the tank cap or leave it slightly open? Well, the answer is, you can indeed screw it on completely. The ingenious design of the system ensures water circulation without the creation of a vacuum. So, go ahead and secure that cap tightly!
I must say, I’m quite pleased with the outcome from the cup. Granted, it doesn’t quite match the caliber of a professional machine, particularly when stacked against Wacaco’s Picopresso. Nonetheless, the GR2 performs admirably in its role.
Just a quick note here – you might have noticed that I didn’t fill the cup to the brim, even though there was still water left in the reservoir. This wasn’t an oversight, but a conscious decision on my part to brew a more robust and flavorful cup of coffee.
Wacaco has produced an excellent video showing the steps involved in making a coffee with.
Your Easy Guide to Cleaning the GR2
One of the standout features of the diverse range of Wacaco products I’ve had the pleasure of testing is their effortless disassembly. Cleaning the GR2 is a breeze, just follow these easy steps:
Unscrew the filter holder and eject the coffee grounds.
Press the extraction nozzle with your finger to remove the filter from the filter holder (see picture below).
Remove the filter from the GR2 body (easier to do when pumping cold water) (see picture below).
Rinse the various components.
Wrapping It Up
I must say, I was genuinely taken aback by the impressive results in the cup delivered by the Minipresso GR2. Not only that, but the ease and speed of its operation truly stood out. Its compact size makes it a perfect travel companion. Given that my job frequently requires me to be on the road for several days, having this handy device with me has been an absolute delight.
Furthermore, the GR2 offers a significant advantage over the Picopresso. It allows you to prepare multiple servings ahead of time. Simply acquire the optional components, and you can conveniently prepare your doses at home in advance.
Just a quick note for all you Nespresso capsule enthusiasts out there! Wacaco has a variant of the GR2, the Minipresso NS2 model, which I haven’t had the chance to test yet. This model allows you to use your beloved Nespresso capsules (which, let’s not forget, can be reused) instead of ground coffee.
⭐⭐⭐⭐⭐
Rating: 5 out of 5.
The Bright Side
Extremely compact
Easy to use
Easy to clean
Price
Interesting cup result
Areas for Improvement
The carrying case and “capsules” are optional (but at a reasonable price).
Pour offrir les meilleures expériences, nous utilisons des technologies telles que les cookies pour stocker et/ou accéder aux informations des appareils. Le fait de consentir à ces technologies nous permettra de traiter des données telles que le comportement de navigation ou les ID uniques sur ce site. Le fait de ne pas consentir ou de retirer son consentement peut avoir un effet négatif sur certaines caractéristiques et fonctions.
Fonctionnel
Always active
Le stockage ou l’accès technique est strictement nécessaire dans la finalité d’intérêt légitime de permettre l’utilisation d’un service spécifique explicitement demandé par l’abonné ou l’internaute, ou dans le seul but d’effectuer la transmission d’une communication sur un réseau de communications électroniques.
Préférences
Le stockage ou l’accès technique est nécessaire dans la finalité d’intérêt légitime de stocker des préférences qui ne sont pas demandées par l’abonné ou la personne utilisant le service.
Statistiques
Le stockage ou l’accès technique qui est utilisé exclusivement à des fins statistiques.Le stockage ou l’accès technique qui est utilisé exclusivement dans des finalités statistiques anonymes. En l’absence d’une assignation à comparaître, d’une conformité volontaire de la part de votre fournisseur d’accès à internet ou d’enregistrements supplémentaires provenant d’une tierce partie, les informations stockées ou extraites à cette seule fin ne peuvent généralement pas être utilisées pour vous identifier.
Marketing
Le stockage ou l’accès technique est nécessaire pour créer des profils d’internautes afin d’envoyer des publicités, ou pour suivre l’internaute sur un site web ou sur plusieurs sites web ayant des finalités marketing similaires.


Leave a Reply